Frances Ng
Frances with an "e"
Road to a short #1
Blog.
blender
April 2022
Tried to get a bit more organised with my Blender learning journey. Especially with Geometry nodes. There are too many things to learn and I reckon some sort of strategies will boost the actual learning efficiency. Unlocking shaders + geometry node in a way that I understand why I was putting a certain node in for that particular effect.
After attempting a few in-depth geometry nodes usage, I decided to take a break from it to give myself a bit of digestion time (so when I come back I will know which concepts that I failed to internalise. Shader was something that scared me off once upon a time, but learning it again with the shader editor seemed to be very intuitive, as the texture will be shown realtime.
I am still far from a freely creative workflow. Setting small "goals" or projects that I can finish is my current strategy (Hugely inspired by the book "Finish: Give yourself the Gift of Done"). Internalising what I learned with my own concepts is the best way to test out if I am grasping the concepts or if I am just copying the exact flow from tutorials that I would not be able to add twist and turns)
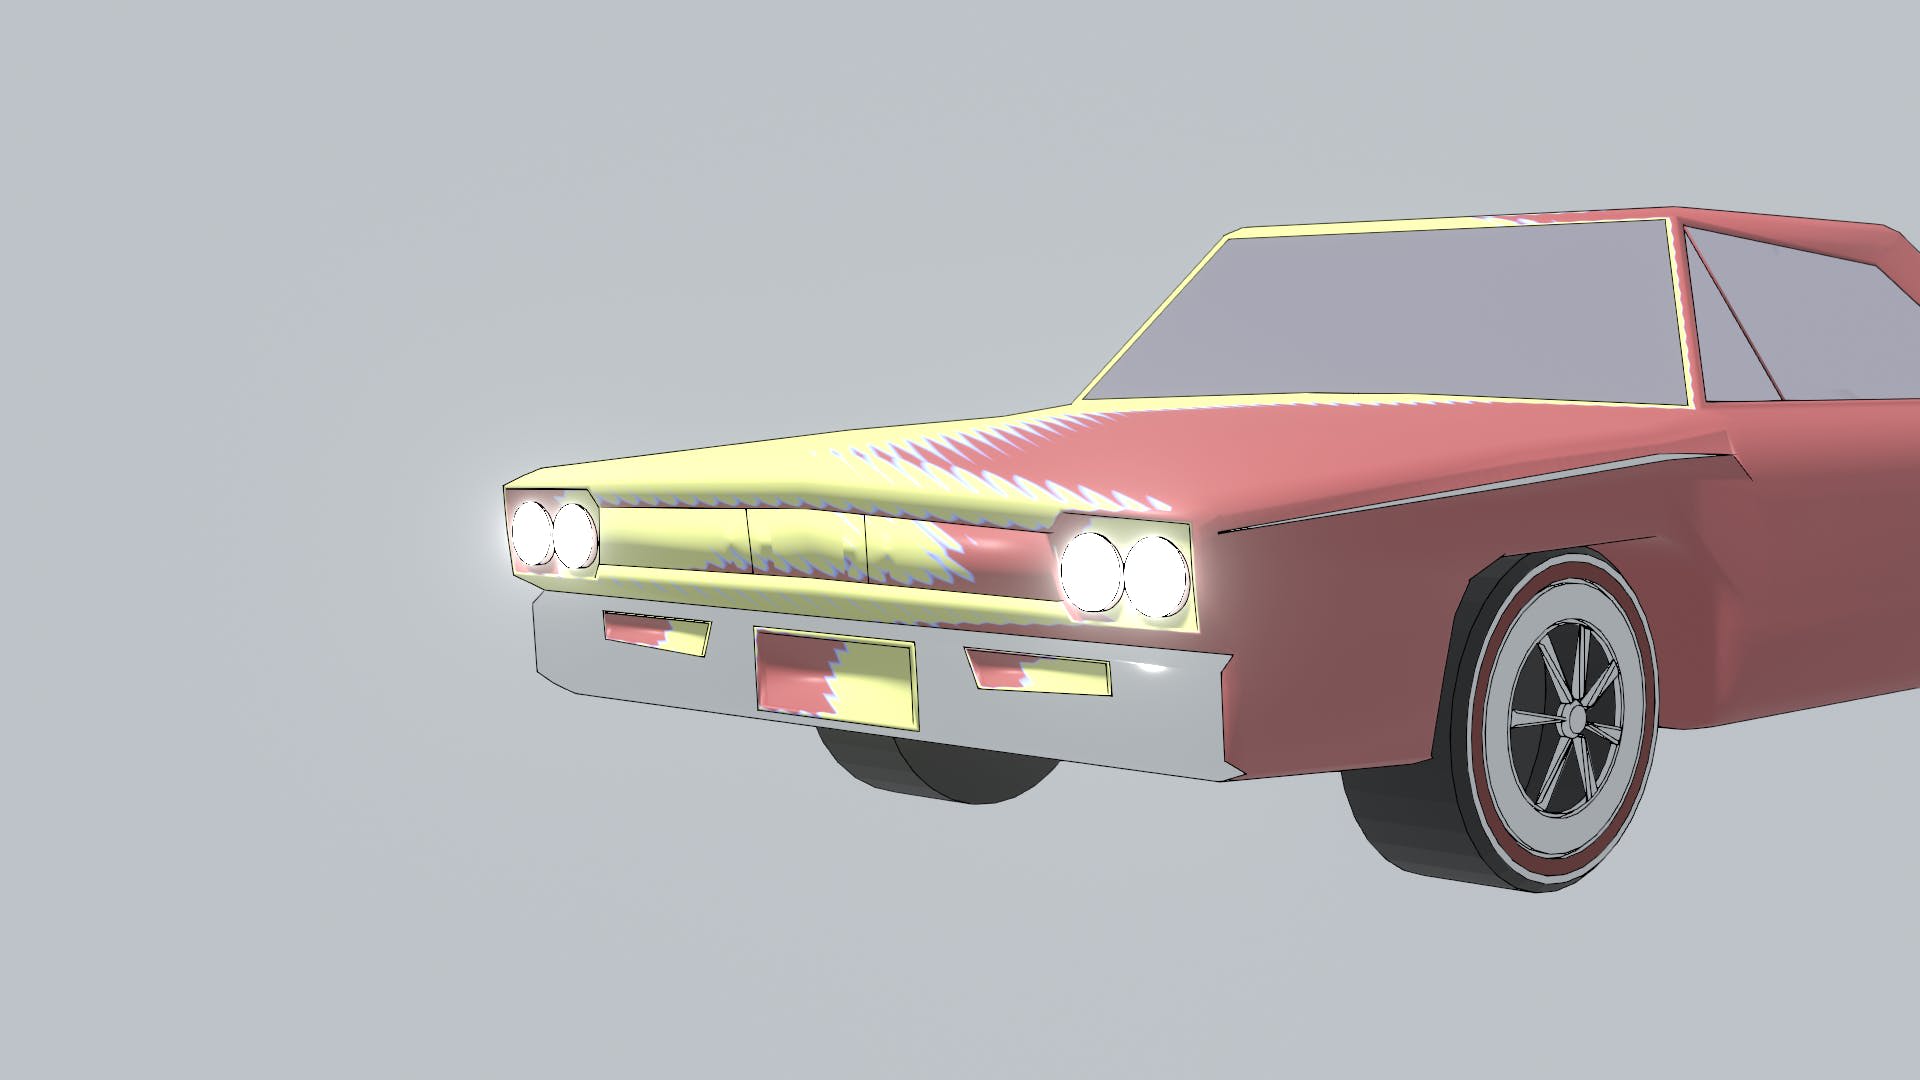
After a bit of GN + shader, I went to 3d modelling on Blender. Not new to 3d modelling because we did a bunch during Uni with solidworks. I had a piece of work on a detailed helicopter model with a pair of hinged doors :laugh: that I still remember to this day, not because of its quality :laugh: but because of the fun elements. To be able to turn a cube into something, it is not "that" difficult. The hurdle is how to add details. Learning to draw from recognising the basic "shape" of what you are drawing. A car is a bunch of cubes and cylinders, but why some people can make it look like a stylish car, or even cartoonised it, it really takes practice. Loads of them. Model what you want to model also.

I recently am obsessed with Satoshi Kon's works, so I thought why not start modelling some scenes? I might not get there but it'll be fun because I love his work, which is full of details and vibrancy. (eventually, I want to try remaking some of his classic editing scenes...). The main challenges for me are
- Modelling the car (lol)
- Learn how to make the toon shader procedurally
- Animating the "Brick Wall" to give the motion blur effect as the car moves
- Parallax of the car + brick wall
Initially, I watched this amazing tutorial to be able to apply a step-ish toon shader with some line hatches which give a very comic-ish shade. But it wasn't what I was looking for in the scene. The scene did not even need a drastic color ramp, because it is monochromatic under the tunnel lighting. I heavily relied on the Mirror modifier for the car model, and the tire (X + Y symmetry), and there are definite parts where I could have added more details, eg. the bonnet could have had more contours, and in the original scene there were rear mirrors stuck out part of the bonnet.
Material-wise, now I am writing this I reckon I could have done with a Shader to RGB with ColorRamp to create the simple steps. And on the windows. I saved time by using glossy bsdf instead of glass to hide the car inner structure (which I didn't model...).
The most interesting part of this scene was animating the brick wall. The wall itself was constructed with brick texture, and some noise for the mortar to make it less realistic. Originally, I was thinking to construct the "rolling" effect with a giant cylinder rotating in Z to make the "moving" effect. With the car staying mostly still, if the rotating was quick enough, it should be able to create that fake motion. But the texture would need to be animated also to at least create that wobbly line movement and randomness of tiles. (Perhaps I should have spent more time in this original method). Finally, I went with the most intuitive method, having a plane extended in Y so it could simply move from A to B in reverse of the car's movement. And it worked the way I wanted it to.
Lastly, on the parallax effect, the car being the focal element takes up like 50% of the screen and moving towards 70%. The "speed" of the wall is the main influencer here.
The unexpected result of this scene was the light patch on the side window. Initially I put my go-to sculpt human model in the car but it looked very scary without hair and stuff so I removed it (Hopefully later when I up my human modelling skills I would be able to freely place living things in the scene) but I left the car light as it was. That point light inside the car structure reflecting on the glossy bsdf created that light patch. and it actually looked like rim (maybe additional details with grease pencil later).
The initial car modelling (referenced after a GTX lol)
Modelled a 7-11 Store lol

I referenced this from the bus stop scene from totoro lol. The opening of the umbrella was based on Simple Deform modifier.

And RIGGING! Rigged pair of eyes


Latest