Frances Ng
Frances with an "e"
Marvelous Designer is marvellous
Blog.
animated short
September 2022
One day, thanks to the algorithm, this video came up and it brought me chills. The composition is simple. One character per shot, with a plain background, and brought to life by the short but clear animation. The "beat" makes you want to snap your fingers. The fluidity is hugely correlated to how body mechanics were handled. But also, there is a very eye-catching element: the secondary action of the clothes. The clothes do not necessarily need to be rendered as realistic as they "should" be in the material world, but adding physics as part of the animation can immediately convince the audience of the same effect.
In the past, when I modelled characters with clothings, with no pipeline or templates, I'd simply go for the method of duplicating the geometry around the area where the clothings are, and the solidifying the geometry with negative thickness to they look like covers. This method only works for a certain kind of style, mostly low-poly work. This approach restricts the clothing to be "attached" to the body. So when animating the character, it is inevitable to key frame the "clothes" as well as the body. Another approach is to "sew" clothes. The first time is always mind-blowing. You are no longer modelling character, you are now a tailor. The same principle of how clothes are made in real life is directly applied. Planes are first cut into shapes, front/back/sleeves etc. By telling the software how you want these pieces to be sewed together, the software can compute the changes of the position of the vertices by the physical properties specified. As a result, a piece of realistic clothings can be fitted and sewed for the character as part of physics simulation. This can be achieved in blender. But alternatively how?
I remember one of my favourite blender tutorial channels (veryveig) did a series of Marvelous Designer tutorials but back then there were just too many other stuff. I think the hurdle in using Marvelous Designer is just getting to know all the functions, and understanding how the workflow can be integrated with other softwares that do other things better. Most of the "yikes" moment in any workflow is when you need to move information from one place to another place, and information is being lost without knowing. Or without knowing why lol. The integration is not complicated, but the configuration needs to be set correctly, ie. the format of import and export.
The method suggested by veryveig is as: Modelling, Rigging and animation were done in blender. The animation is then being imported into Marvelous Designer in Alembic format (.abc). In Marvelous Designer, the model imported is known as avatar. Then the fun stuff happens. It is like "Paint" or if you say procreate whatever. Draw polygons, internal shapes so they can be "cut & sew", add top stitches to the edges of these polygons, position 2d graphics to be "printed" on the fabric etc etc. I need to figure out how to make a pair of converse!! lol maybe later. Watching the simulation fits the clothings on a moving character is absolutely mind-blowing. Salute to those brilliant minds behind. With the clothes also being animated, they are then ready to be imported back to Blender. The idea here is that since the animation has already been handled by Marvelous Designer, the only information that needs to be bridged back to blender is the clothing model and the respective positions of the model (vertices) throughout the animation. Hence, "MDD" is the format to go for. Then viola.
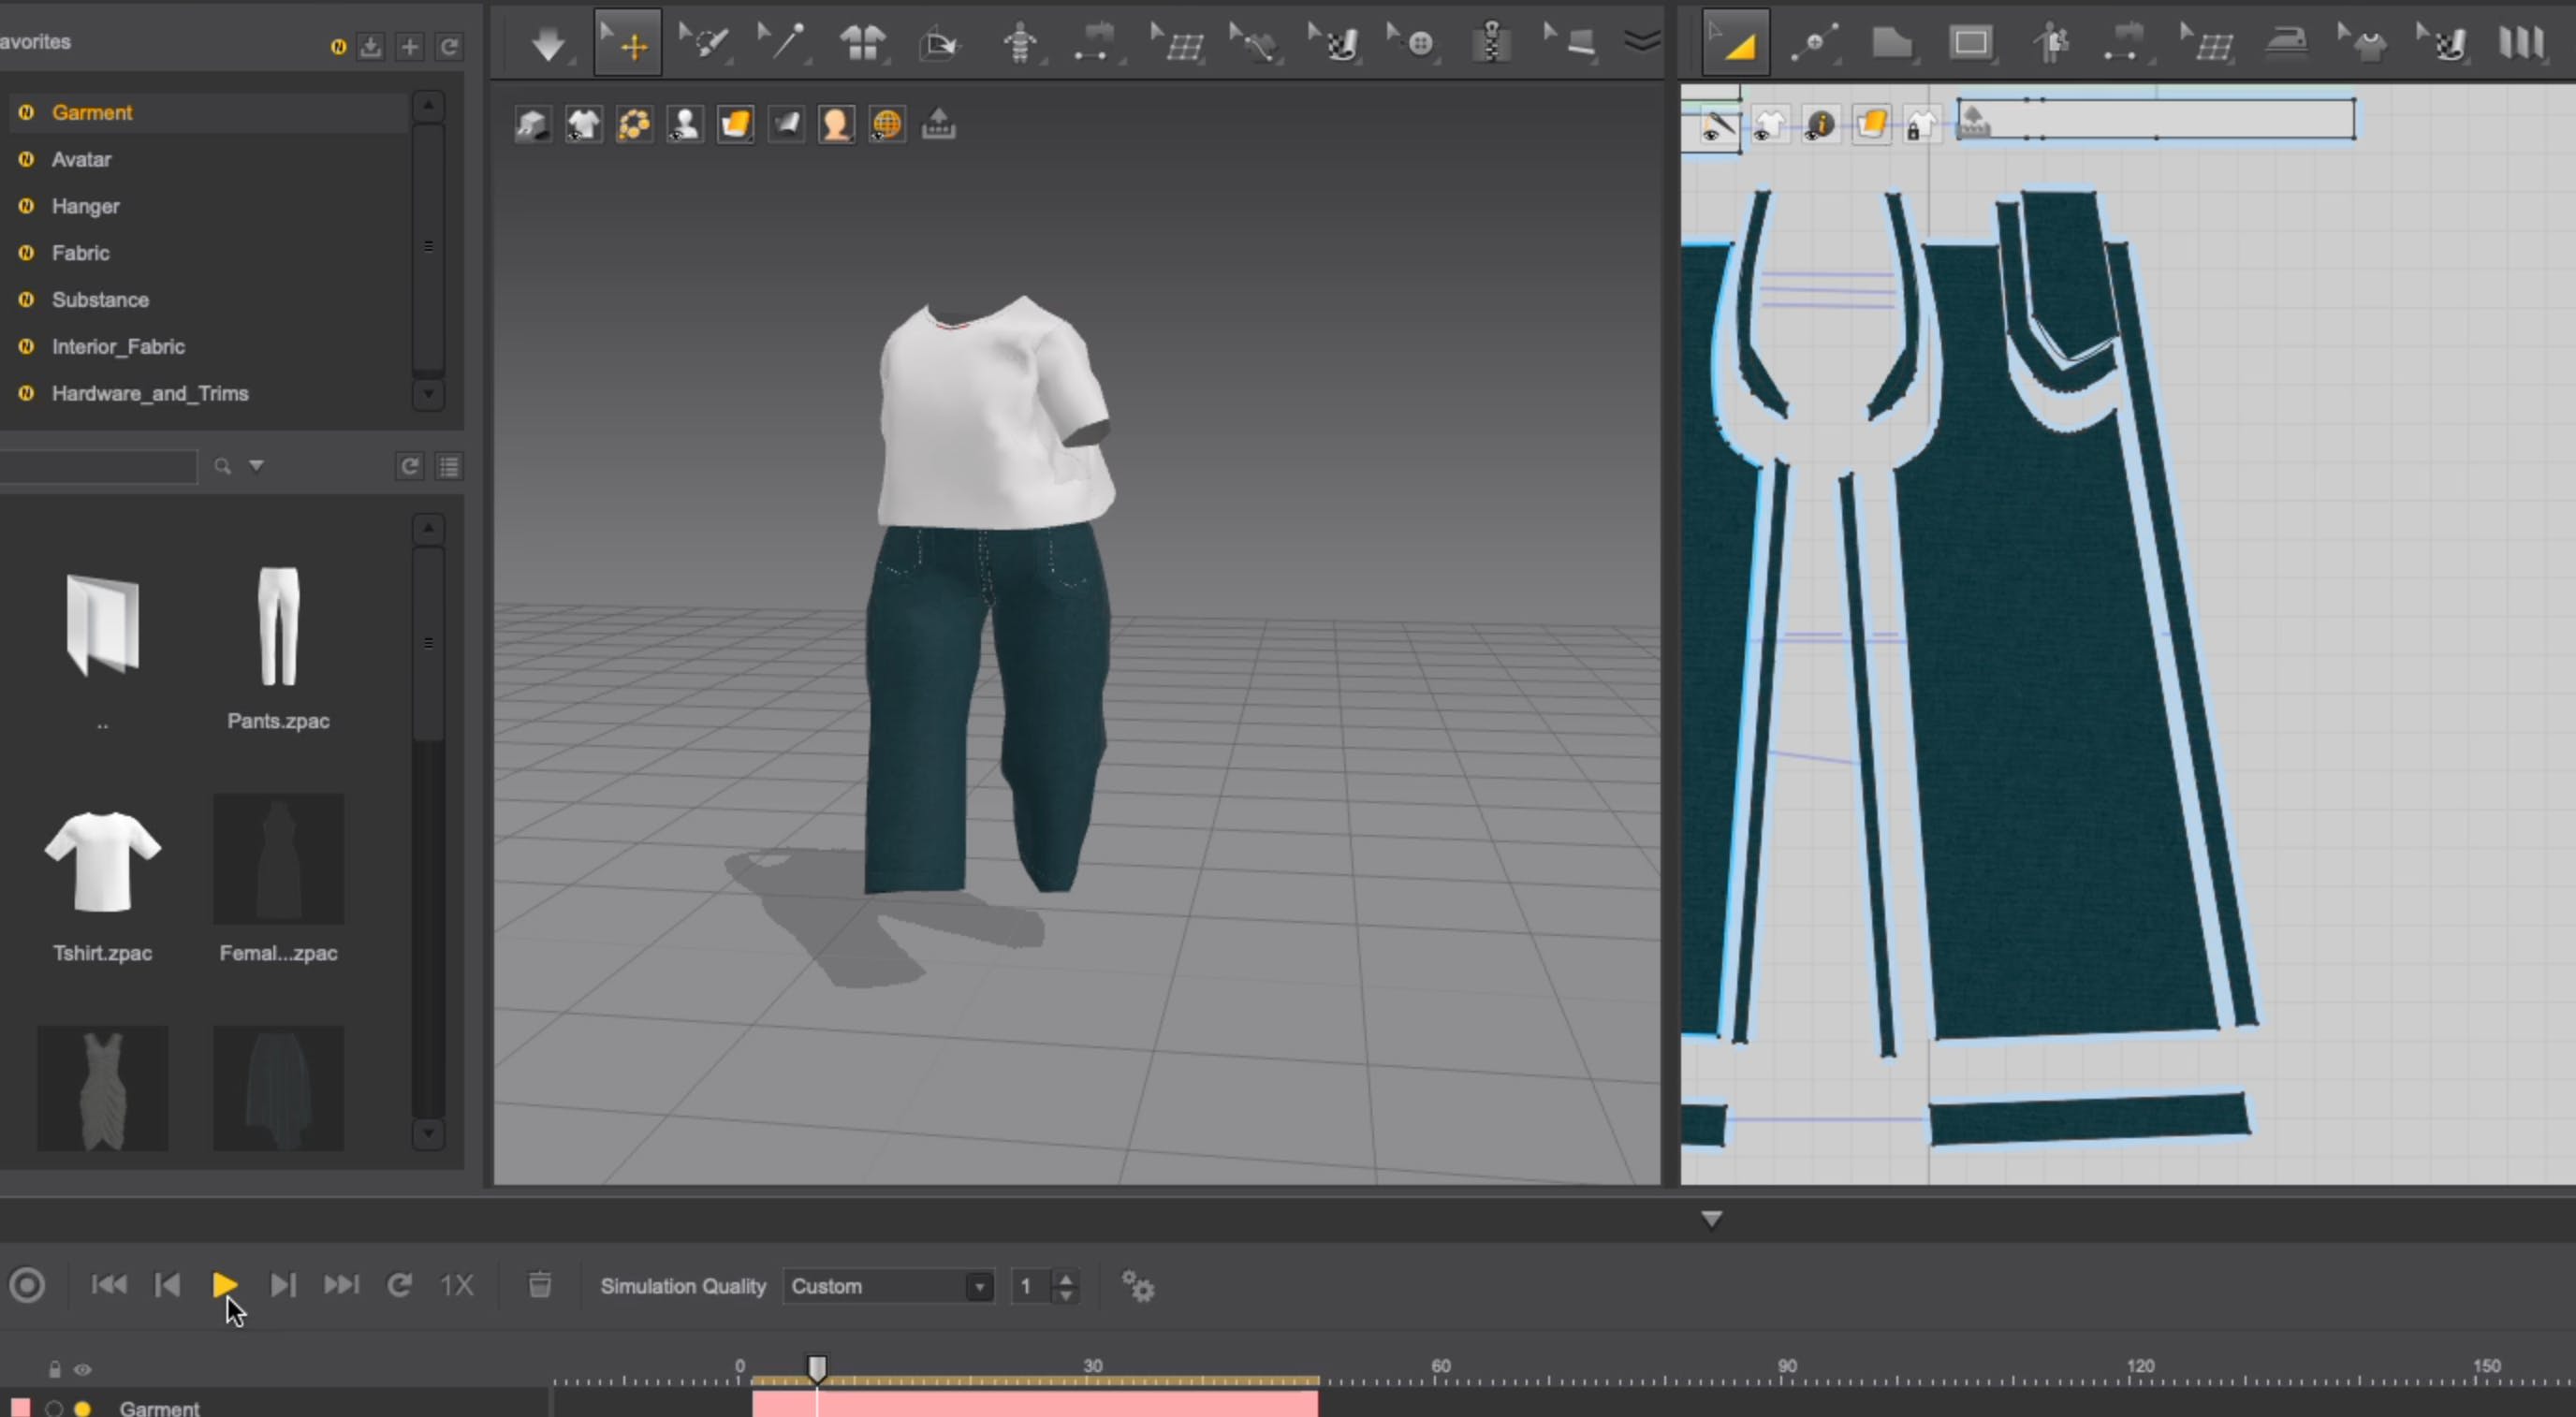
The result is great (?). Basic T-shirt with wide-legged jeans. Gotta say Marvelous Designer is very beginner friendly, the results keep you hooked into making better clothes, or more fancy clothes.
Latest