Frances Ng
Frances with an "e"
Sculpting 3d character with Blender
Blog.
sculpting
blender
August 2022
The title sounds like a youtube tutorial. I spent an entire week almost on one sculpture, and it was nothing but therapeutic. I had the goal to rig a head with a simple model so I went for sculpting because I wanted to try with a more realistic model. The goal was partially to learn key posing expressions and sculpt a character/head that is workable. Workable meaning there is an optimal amount of vertices for rigging/animations without losing details. Sculpting a realistic character is a good test for proportions. Sometimes stylised can be a toxin for excusing wrongfully proportioned characters.
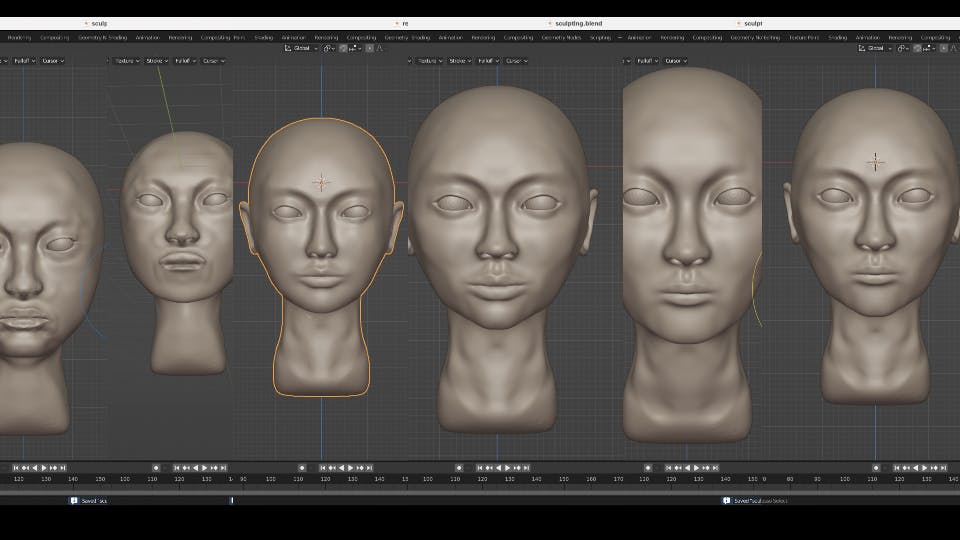
Head - Process
Sculpting started with a cube. The process was simple. Start with a low number of vertices, once you reach the most that you can sculpt at that level of resolution, do remesh to add more vertices to work with, sculpt more details and repeat. Looking at a horribly looking initial sculpt sometimes is very discouraging, because it can look very very bad. but it really shows how a model can look very different with a few vertices at slightly different positions. In the end it still goes down to experimenting with the orientations, positions, sizes etc. Got really comfortable with Grab, Scrape, Snake hook, Smooth, Crease, Pinch brushes, and it was joy all the way.
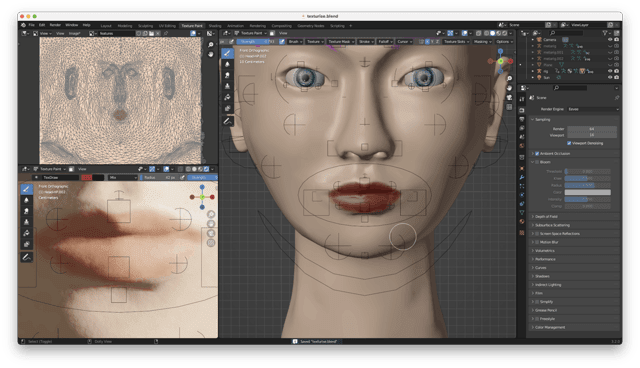
Texture + Texture Painting
Adding texture to the skin will make any sculpture look alive. Our skins have bumps, poles, subsurface color (blood) etc, many elements that are on top of the basic skin colour, and procedurally it's achievable with Voronoi and noise texture. Goose Bumps. Texture painting is literally painting on top of a texture, and I use this to add lips color + brow, and freckles.

Hair
I watched this arcane style hair tutorial on making one string of hair by a particle system. MIND-BLOWN. and I use this system to add bangs for the character. The spectrum to fiddle with the shader is unreal, I was really happy with the 'highlighting' effect by adding one more mix shader. Sometimes using particle systems extensively will slow down the performance a lot, but for this since the amount of hair is low, and instancing the hair with the original collection almost does nothing to the load.

Rigging
Originally, using Rigify was probably the quickest way to achieve a moveable model. and I did. What Rigify does is that it can generate a set of rig that is common enough for any human head, meaning the set of controls that it generates pretty much let you to control the head however you want. Expression, movements etc.

Later I tried another method when doing expression tests. Expression Tests are posing the character for a set of expressions, some really push the model to its extreme but you will get an idea of where it needs to be adjusted. The expression tests' expressions were heavily referenced from this book Anatomy of Facial Expression. Understanding the muscles involve is the key of making good poses, because when you smile, you don't just move your mouth, your cheek, your nose, your ears, your brows, forehead, basically most of the muscles move in symphony to produce the final "smile". This another method is using Shape keys. Shape keys give you the freedom to simply edit the vertices for a specific shape. eg. adding a "Eye Smile" shape key to define how the eye should "move" or deform, and animate the value will give you quite a smooth transition between the rest post and the smile.
Latest